
Start here
Getting started
Connect your repository and publish your first content change.
1. Create your account and organization
Open Prosefly, create an account, and verify your email with the six-digit code. Create an organization for your content. The organization slug becomes part of its workspace URL and cannot be changed or reused after deletion.
An eligible new account receives one calendar-month Personal trial when creating its first organization. See plans for capacity, and review current amounts in the app’s Billing page.
2. Connect GitHub
Open Organization settings → Repositories. Follow the account-linking and GitHub App authorization steps. Grant the app access to the repositories you intend to use, then connect a repository in Prosefly.
Read access is sufficient for scanning. Publishing requires the necessary write permissions. An organization-owned GitHub installation may need approval from its owner.
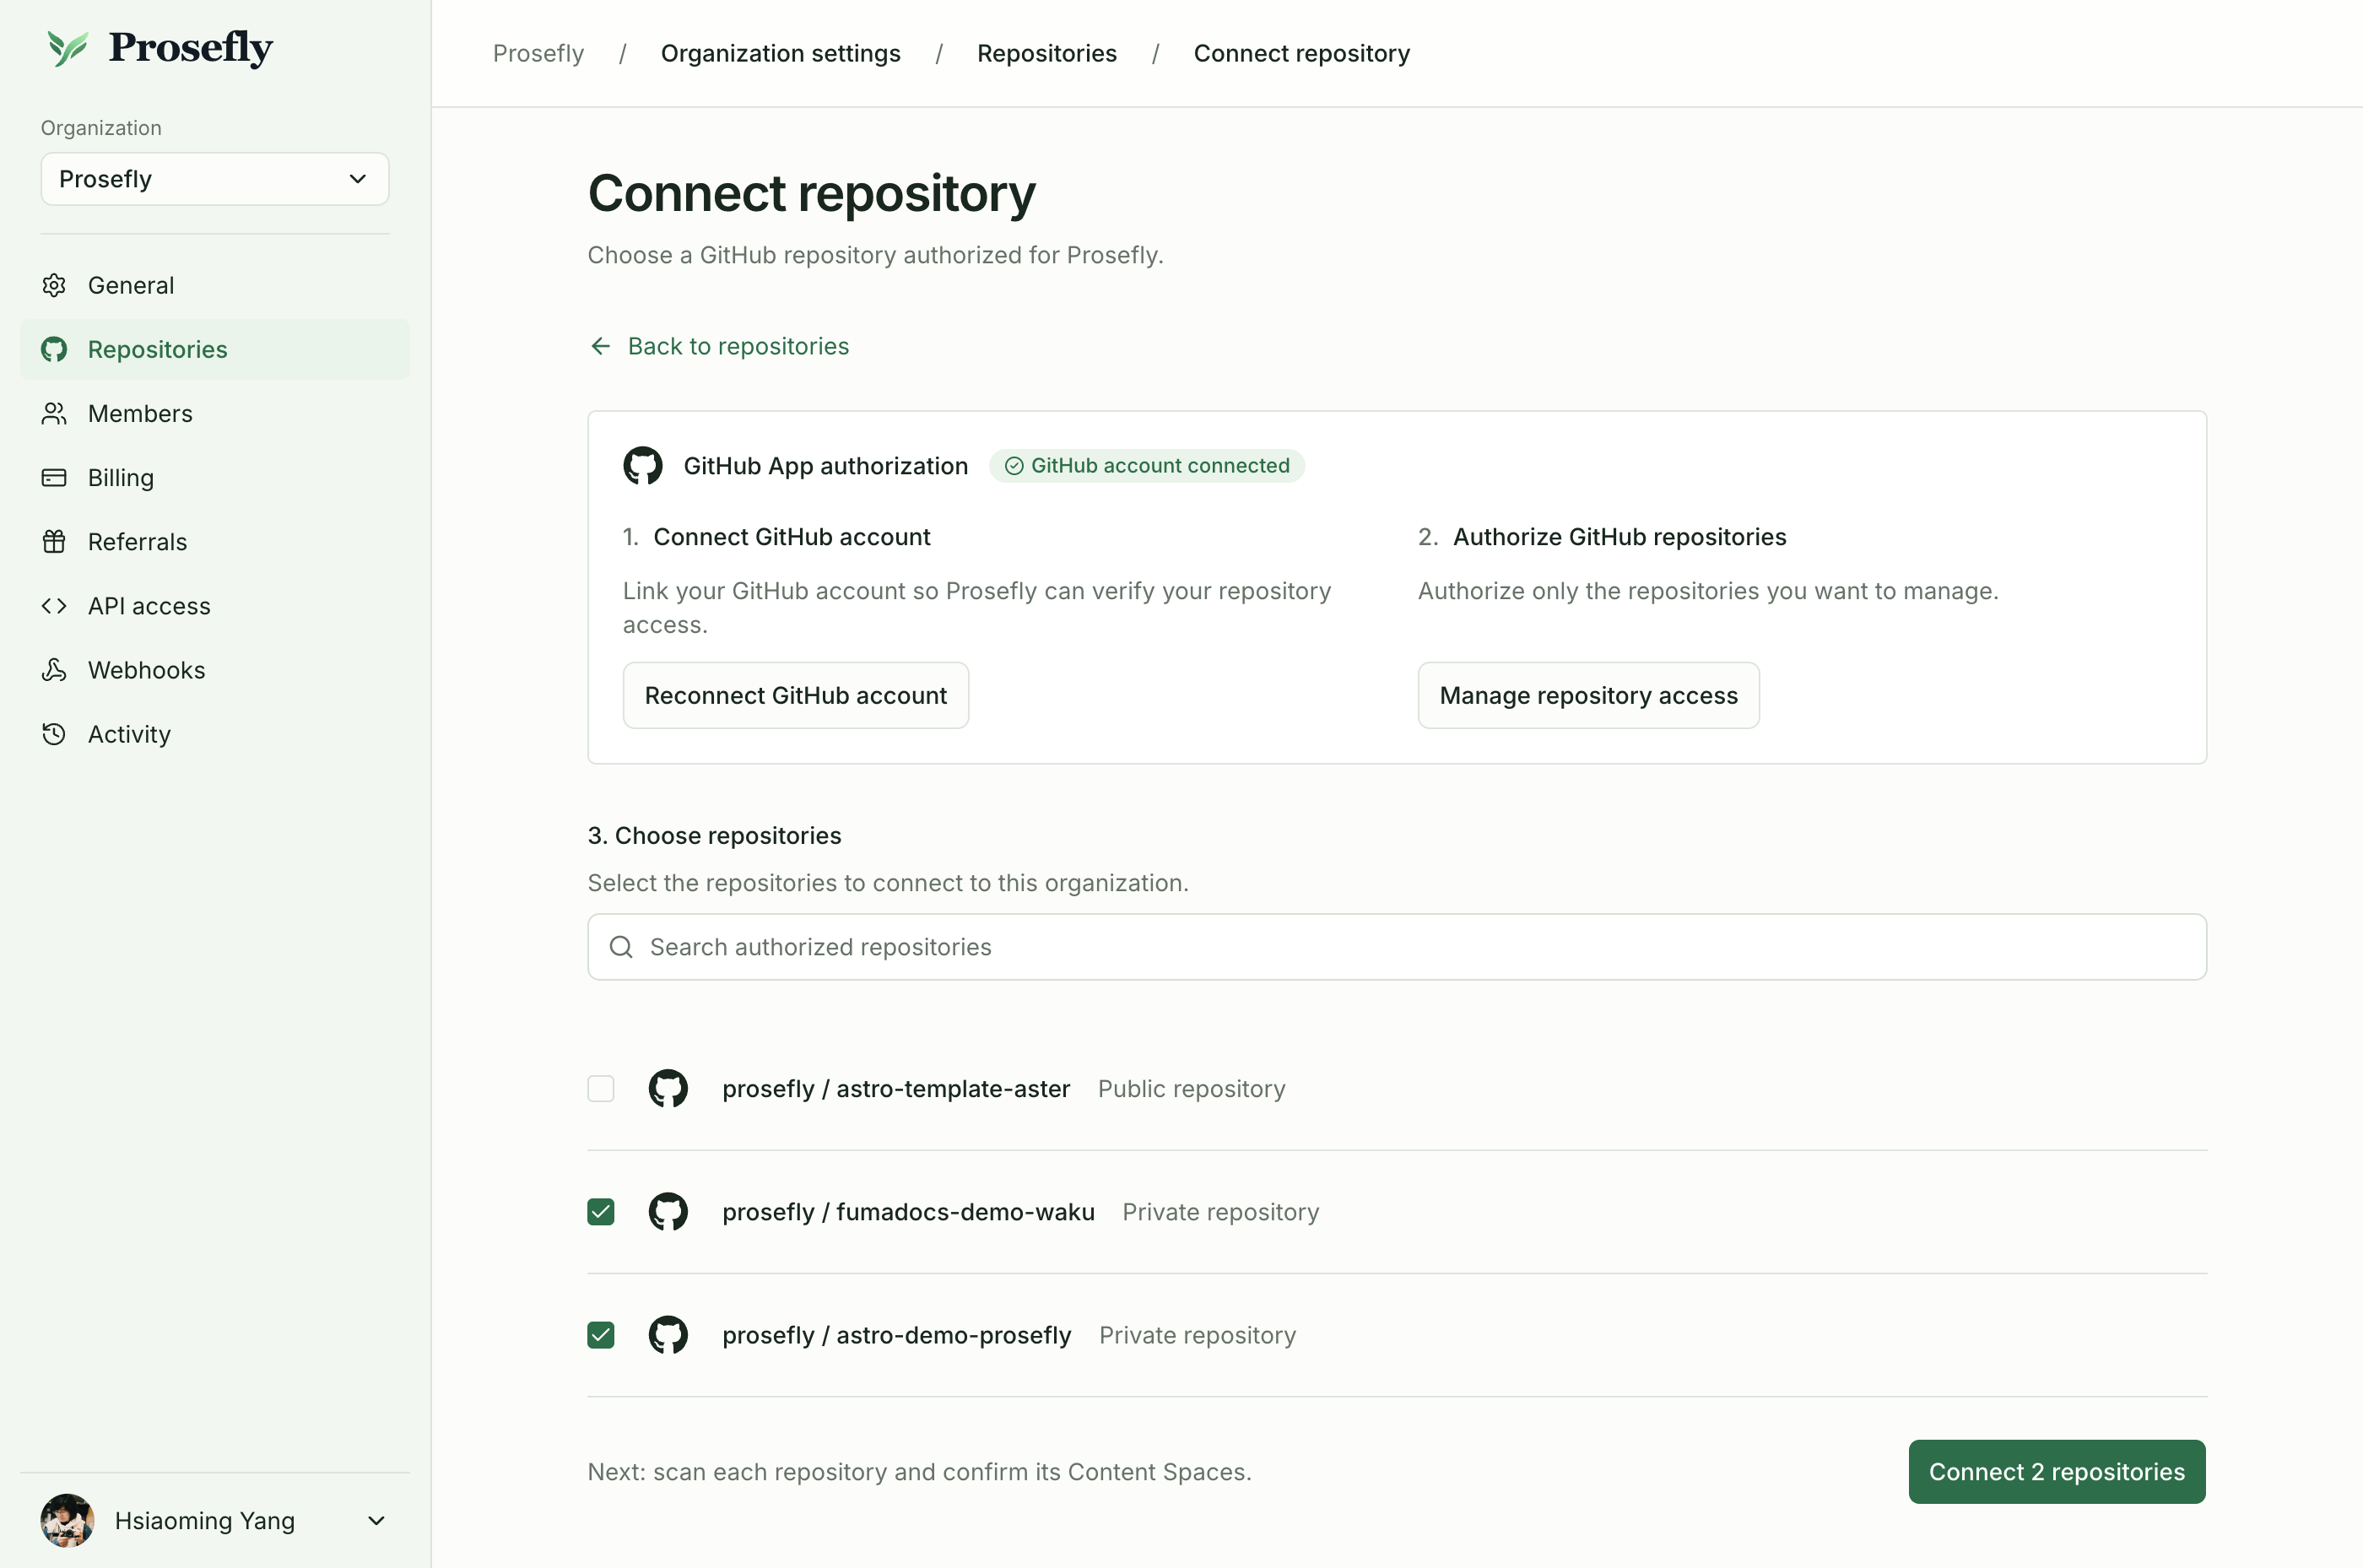
For the complete authorization and scanning steps, follow Connect GitHub.
3. Scan and confirm your Spaces
Scan the repository’s target branch. Review the detected content Spaces and Collections, then confirm the ones you want. Wait for indexing to finish before opening the content.
A Space describes a content area in a repository. A Collection describes a group of entries, such as docs or blog posts. Learn about Spaces.
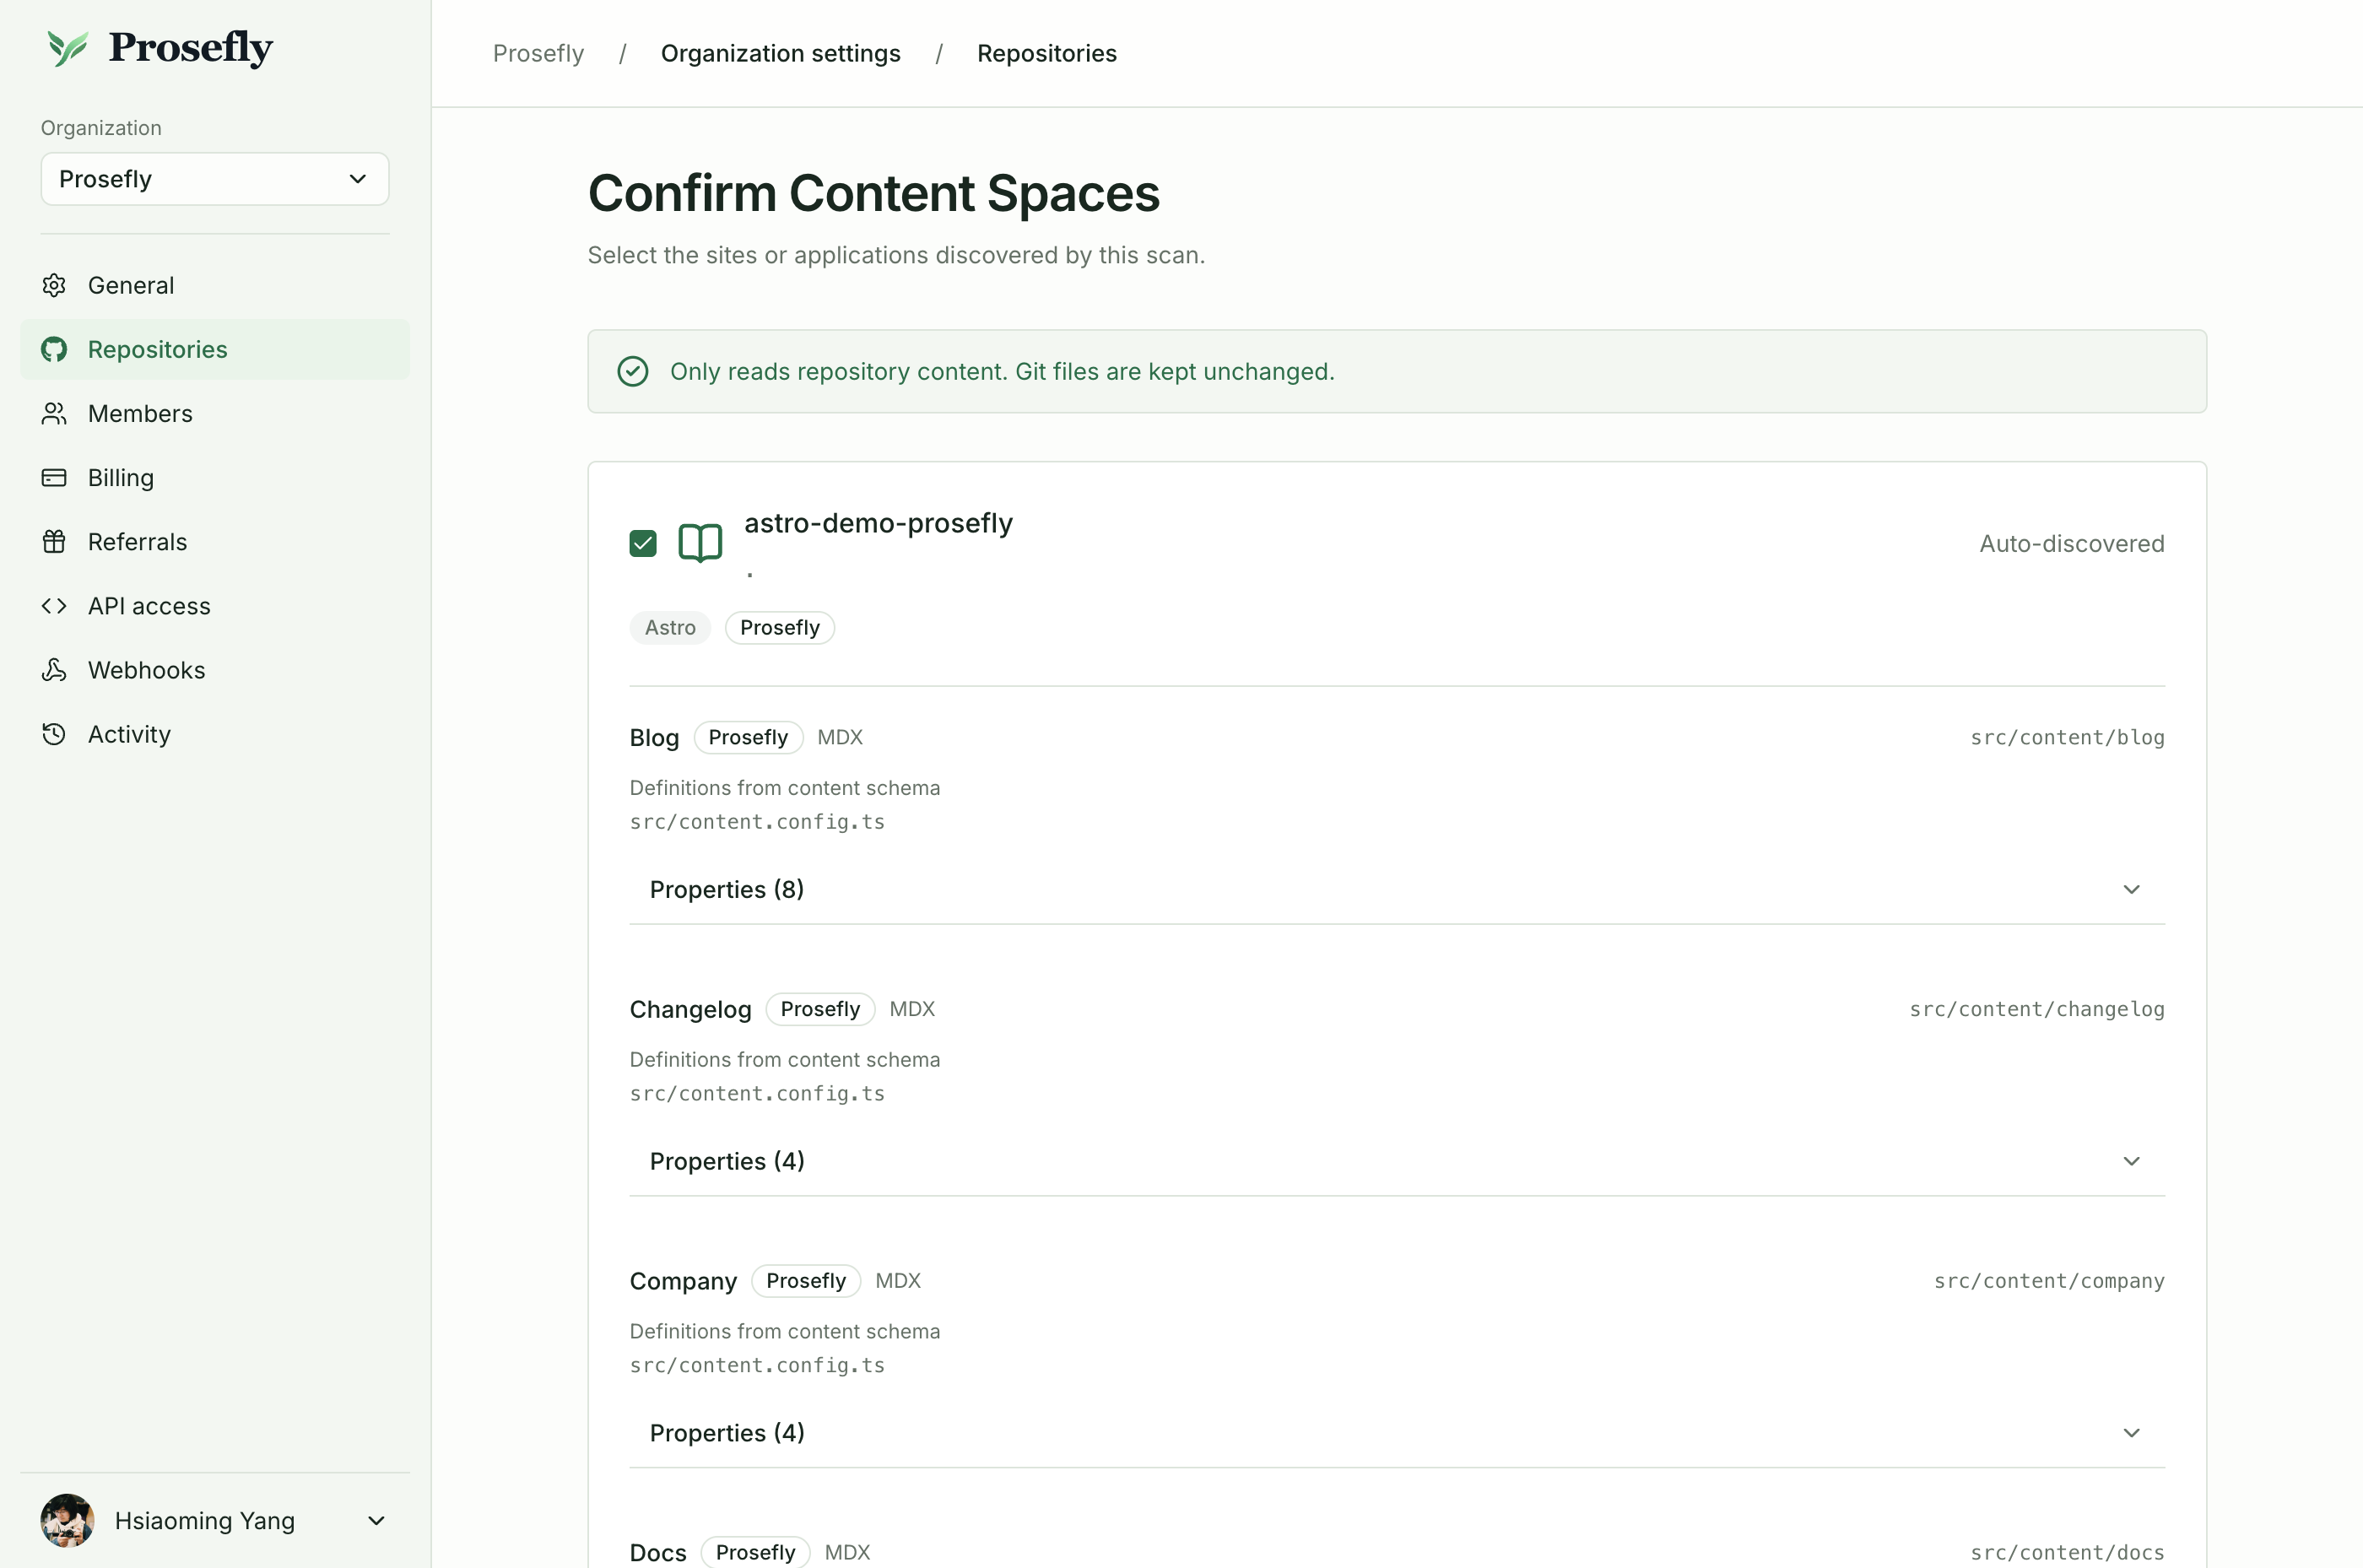
Review the detected content paths and Collections before confirming a content Space.
4. Edit a page
Open a Space and select an entry from Content. Edit visually or switch to Source. Use Properties to update the document’s fields. Check the save status before leaving.
5. Review and publish
Open the publication review, inspect the affected files and diff, and publish using the Space’s configured mode. A commit updates the target branch; a pull request needs to be merged into that branch. Your existing website build then handles deployment.
Read the publishing guide before your first publication.
Last updated Oct 9, 2026